Schedule Reports: Allocated Payments
Overview
This guide provides step-by-step instructions for scheduling the Allocated Payments report from SOE EXACT.
The report contains all payments received by a practice for a given period. The information is used to show Collection figures in Dental Dash.
Instructions
Open EXACT Scheduler
Step 1. Sign into SOE EXACT
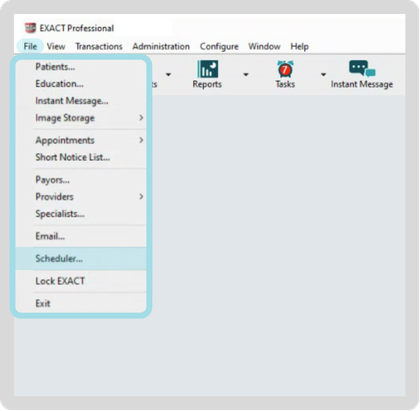
Step 2. Navigate to File > Scheduler.
Step 1. Sign in to SOE EXACT.
Step 2. Navigate to File > Scheduler from the menu bar.
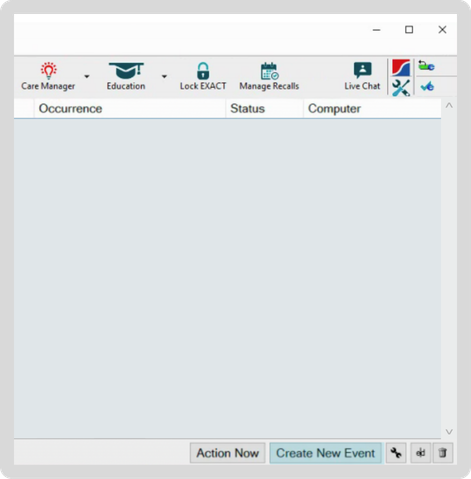
Step 3. Click the Create New Event button in the bottom right corner.
Create New Event
Step 4. Select Email as the Event Type.
From the Available Events list select Allocated Payments.
Press Next to proceed.
TODO: Screenshot of report selection window
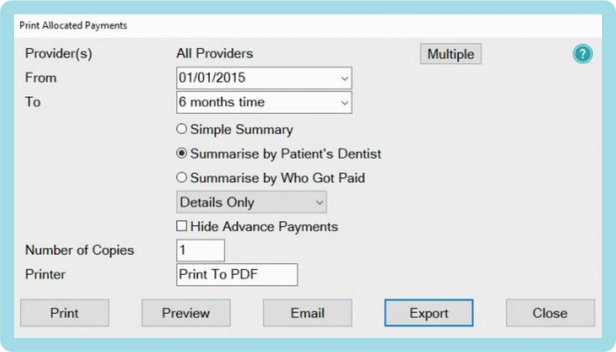
Step 5. Configure the parameters for the report as follows:
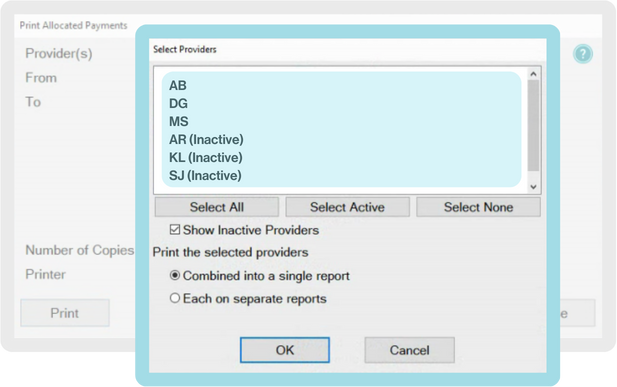
For Provider(s) choose Multiple to open the Providers selection. Select All providers, including all inactive providers. Opt to Combine into a single report.
Configure the remaining report options.
| Option | Value |
|---|---|
| Provider(s) | All Providers |
| From | Set the From date to the opening month of your practice to enable Dental Dash to analyse your practice's historical growth. |
| To | In the To dropdown, pick 6 months time. |
| Summarise by Patient's Dentist | Check the Summarise by Patient's Dentist box. |
| Details Only | Choose Details Only. |
| Hide Advance Payments | Leave Hide Advance Payments unchecked. |
Click Next > to proceed.
Send Reports via Email
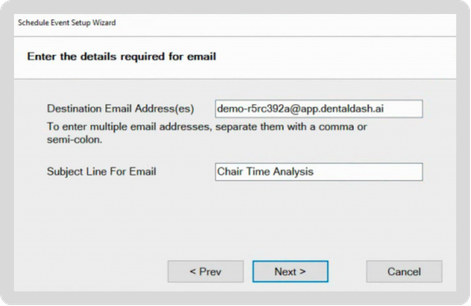
Step 6. Enter the destination email address.
This can be found in your Dental Dash app, under Settings > EXACT.
Copy and paste the email address into the form. You can leave the Subject field as it is.
Press Next to proceed.
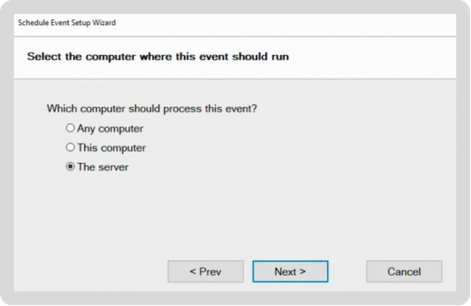
Step 7. Select The Server option for processing this event.
Press Next to proceed.
Schedule Report
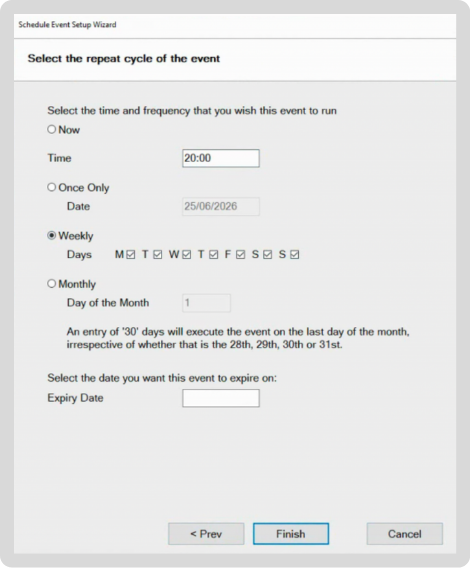
Step 8. Schedule the report.
Select Weekly and tick all the days of the week Monday (M) through Sunday (S).
Set the time to at least 30 minutes after the practice close time.
Press Finish to schedule the report.